

There are two steps in getting printing working on the laptop network for Mac OSX 10.6 and 10.7.
Apple provide a GUI interfaces for both these tasks.
Open your web-browser.
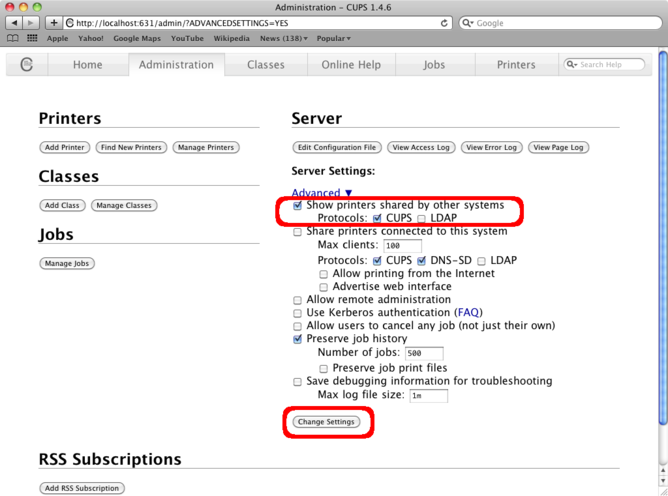
Go to your local printer configuration webpage http://localhost:631/admin/?ADVANCEDSETTINGS=YES
You may find that the CUPS server doesn't have its web interface enabled, in which case you will get an error message "Server internal error" together with a message telling you to start the web interface, which you should do.
cupsctl WebInterface=yes
Revisit the web page http://localhost:631/admin/?ADVANCEDSETTINGS=YES and it should now work correctly.
As shown in the picture below, select the options:
Then click on "Change Settings"
Your web-browser will prompt for a login. You need to use an account on your OSX computer that can administer the computer (this is NOT your Raven account).
Now your computer will be able to hear the printer advertisements from our print server. It will take a minimum of 90 seconds for your computer to find all of the available printers and settle down. This process has been observed to take 30 minutes on some OSX 10.7 computers.
Please do not fiddle with the other settings unless you understand what you are doing. We only support the setting described above.
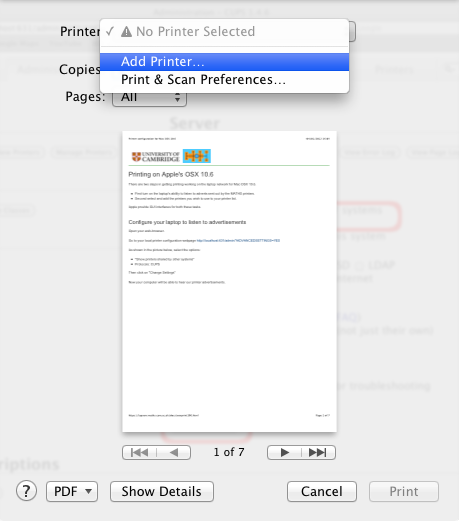
We have generally found it to be easier to add a printer from a software application rather than using system preferences. Using a software application like your web-browser (e.g. firefox or safari). Select print (e.g. File menu then print or hold down the command key and tap the P key). Then click on the priner selection drop-down box and select "Add Printer":
Next select a printer from the list. In this example, below, the DAMTP printer called bcopy is selected. The click on "Add" at bottom right of the window:

This method used to work, but as of 12/2011 the Print & Fax dialogue in System Preferences shows all printers and is often very slow to respond.
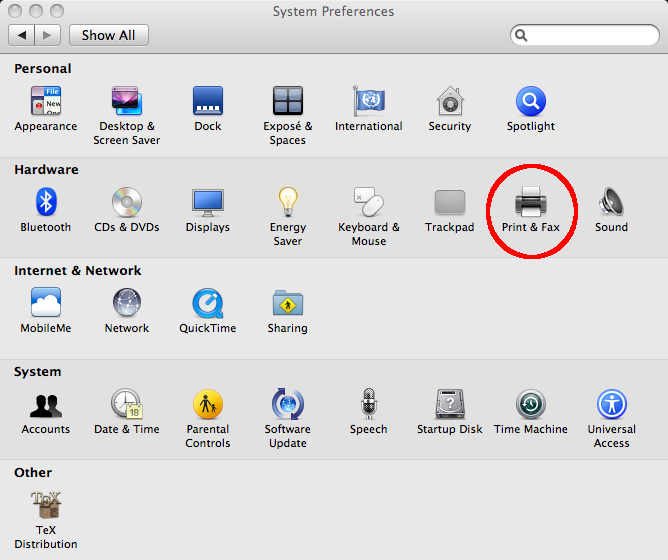
Start up System Preferences, and select Print & Fax
Since most of our printers default to using A4 paper, you probably want to set the Default Paper size:

Click on the + (plus) icon, and the Print Browser will appear. Ensure that the Default Browser is selected, and a list of available printers should appear. If you select one it will show the Name, Location and Model (Print Using) for the printer. In this example we are adding magpie which is a DAMTP printer. Finally click on Add.
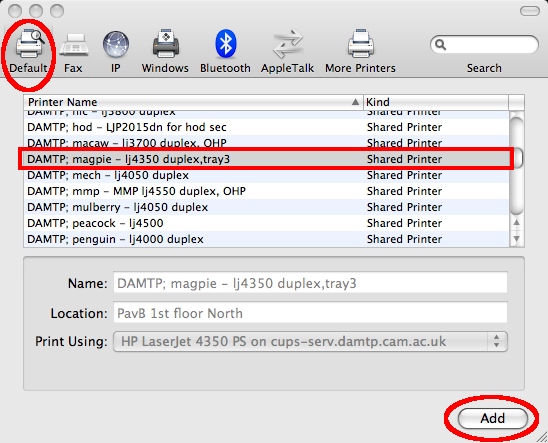
Note that magpie is just an example, and in fact that printer no longer exists - it was replaced by the printer b1north in 2009.
Back in the Print & Fax window it should now show the added printer, with the Name etc displayed if you select a printer. To see more details of a printer select it, and click on Options & Supplies....
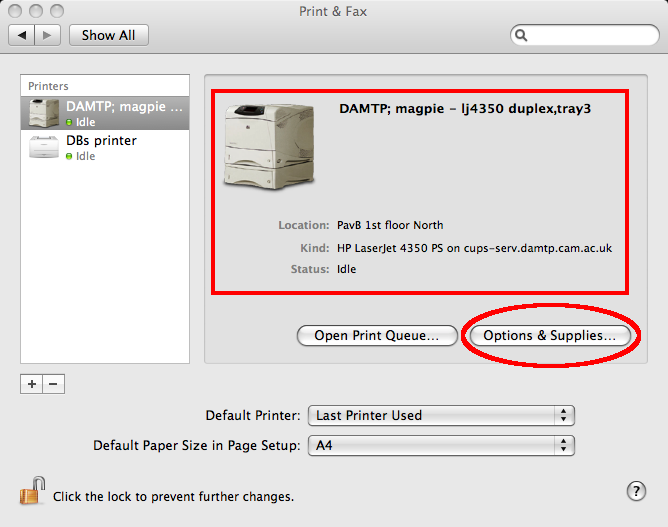
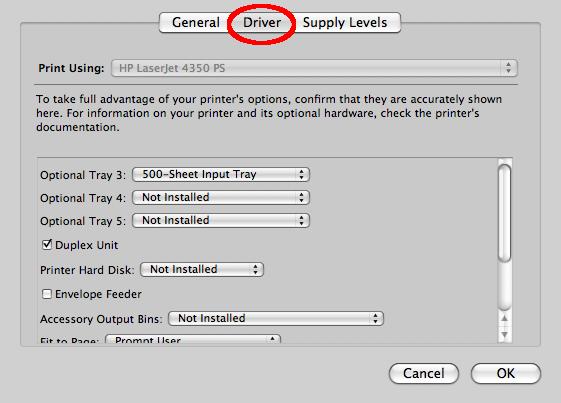
This will display an overlay on the Print & Fax window which shows more details including a Driver section which can be used to tell which printers support duplexing or have extra paper trays etc.
Note that currently any printers which don't say which department they belong to are owned by DPMMS. This may be changed at some point.
If OSX is experiencing problems with printing (after the above) then try: