

This document tries to explain how to configure a network interface on a machine running Microsoft Windows XP professional SP2 to be usable on our Laptop Network. If things arn't clear please let us know.
If after you have configured the settings below you find you still can't see
\\lapserv.maths.cam.ac.uk, if it's running, try checking any
firewall programs (zone alarm has been known to cause problems).
|
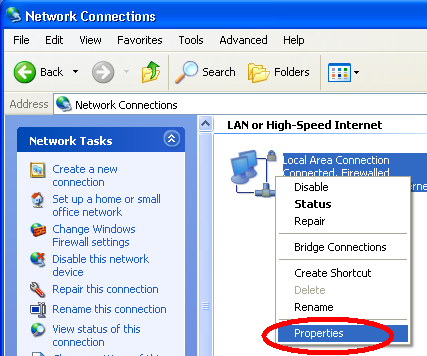
Log into the machine as a user with Admin privelages and go to the Control panel. If you use the Catagory view select Network and Internet Connections to show network-related tasks. In either view pick Network Connections. Then right-click on the relevant network device and select Properties from the list displayed. |
|
|
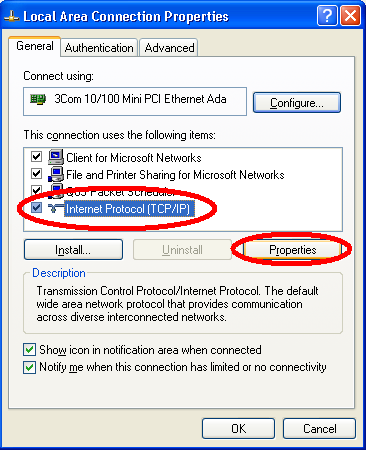
In the General pane select the Internet Protocol [TCP/IP] line and click on Properties. |
|
|
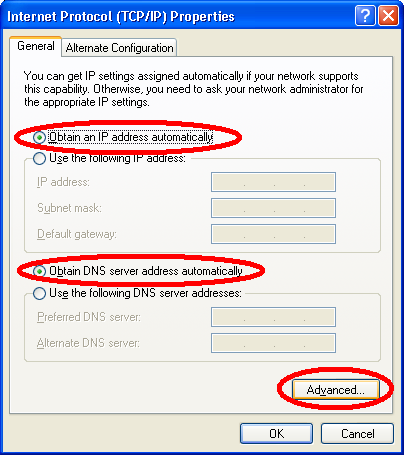
In the General pane select the Obtain an IP address automatically and the Obtain DNS server address automatically radio buttons. Then click on the Advanced button. |
|
|
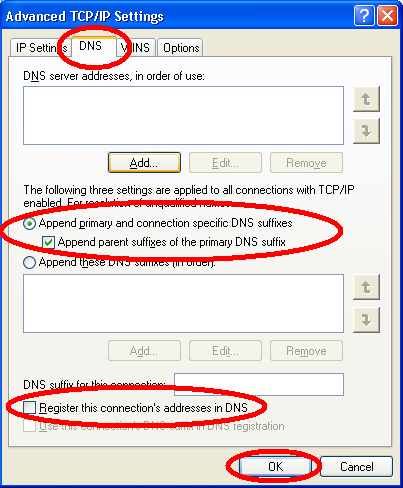
Switch to the DNS pane and select the Append primary and connection specific DNS suffixes radio button. Select the Append parent suffixes of the primary DNS suffix radio button and unselect the Register this connection's address in DNS box. Click on the OK button. |
|
The new settings should take effect at once, but if they don't seem to you can try disconnecting the network for a short time (or disable/re-enable the network device from the control-panel).
This setup has been tested on Windows XP professional. Configuration should be very similar for versions of 2K or XP. For details on how to configure network interfaces on other versions of Windows please refer to the documentation provided with the system or contact your local computer support staff.